
DonCorson
[AHCI]
3358

Exploratory Watchmaking - Rounding-Up Tool
Rounding-Up Tool Exploratory Group
by ei8htohms
Yesterday we convened the first ever meeting of the the NYC Rounding-Up Tool Exploratory Group. I say “Exploratory Group” because none of the three of us had any idea how to use this tool and there’s not a lot of folks around to ask so, as is necessary with many watchmaking tools and operations, we decided to just figure it out.
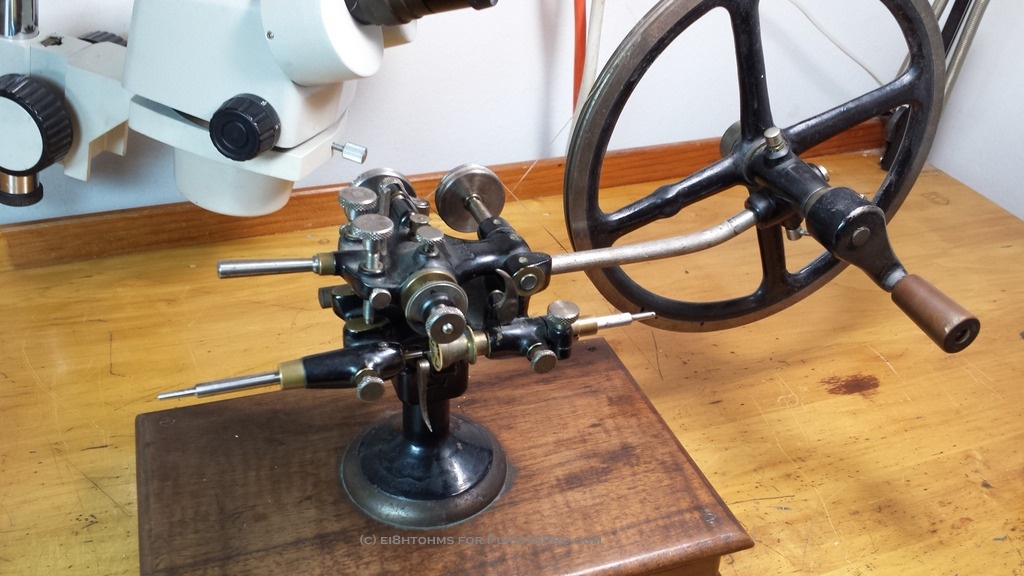
A rounding-up tool (or topping tool if you’re British) is a tool for cutting or reshaping the teeth of watch wheels. As far as I can tell It was used primarily in the repair of pocket watches during the time when finding an exact replacement wheel for any given repair was by no means guaranteed and an enterprising watchmaker might need to find the closest fit wheel available and then modify it to fit the movement being repaired. Another common application would have been to reshape damaged teeth or to perform a finishing operation on a repaired or replaced section of teeth in an otherwise good wheel. One can also make gear teeth from scratch with this tool by simply slitting the wheel blank in a precisely indexed manner, but it wouldn’t be practical to make wheels in series this way I imagine.
dust freshly removed
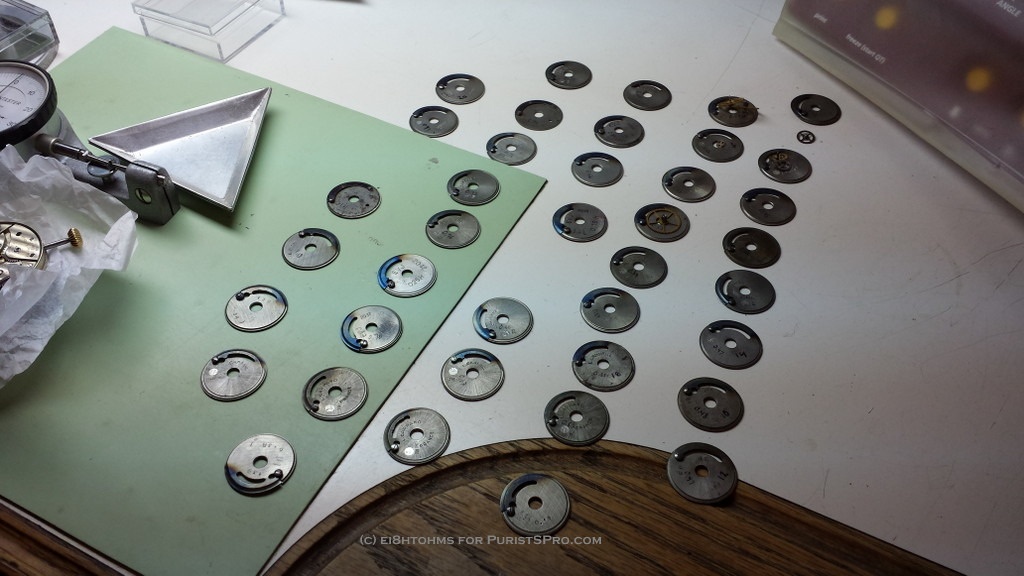
As with any gear cutting operation, you must have a cutter of the correct size for the wheel you’re working on. This tool came with a selection of cutters, most of which appear to be in usable condition, but all of which are for larger size wheels. The smallest cutter width amongst the “set” I have is approximately 0.40 mm, which corresponds approximately to the circular pitch of the wheel being being cut. If you made a wheel with a circular pitch of 0.40 mm with 72 teeth, the wheel would be a little over nine millimeters in diameter and the average wristwatch wheel is probably smaller than eight millimeters.
no, we did not round-up any gears in the Patek Philippe movement
The way the rounding-up tool works is that it drives a cutter with a slightly offset indexing blade perpendicular to the wheel being cut and the serrated cutting teeth carve out the space between the teeth of the wheel being cut until the indexing blade then captures the next tooth and rotates the wheel by one tooth spacing and performs the same operation again.
If the blade is properly set so as to fall nicely between the teeth and the wheel is properly indexed to begin with, you end up with very precisely cut teeth which are very well centered to the arbor upon which the wheel is turning. If the indexing of the wheel is inconsistent however, a rounding-up tool is not going to correct it for you.

indexing blade and serrated cutting surface
We only experimented with a few of the cutters in my “set” (I’m using the word loosely here, it seems to be a mixture of at least three different sets, with different labeling conventions and who knows what other distinctions), but found that in addition to the different cutter thicknesses, some were for making teeth with rounded troughs and some made flat troughs (for your old school looking gear teeth).

Luke checking the cutter depth
So the tool has a variety of adjustments that we were mostly able to decipher. You can control the centering of the cutter (which fits snugly onto a slightly tapered cylinder) using an adjustment screw on the backside of the tool and a little claw-like arm on the front of the tool to align it. Then you also center the wheel being cut in a similar manner by sliding the sleeve in the right side of the tool so that the brass support will hold the wheel in place approximately in line with the little claw that swings up from the bottom. This support is important so that as the cutter forms the teeth it doesn’t bend the wheel too much.

Lots of adjustments
Then you center your wheel in line with your support by sliding the spindle on the right side in or out until the little hole that holds the pivot of your wheel is in the right position (the sleeve that holds the brass support can be adjusted and locked while still leaving the spindle free to move, well, somewhat free: the spindle in mine is pretty stiff). Then you slide the spindle on the left side into place to hold your wheel securely and you’re ready to start cutting.
Of course first you also have to adjust your cutter depth using the micrometric adjustments on the top left hand side of the tool. There are two adjusting knobs, both of which can be locked with a retaining screw and one of the knobs has markings that can be used for precise adjustment in conjunction with an index post next to the knob. I imagine you’d set the knob towards the back of the machine to your absolute maximum depth and lock it in place and then use the other adjustment while performing the cutting operation to gradually lower the cutter into place.

cutting
So then we fit up a wheel and started cutting. This video was taken after we had already removed significant material from the wheel and switched to a cutter with a slightly small width and (unexpectedly) a flat trough profile (which ironically matched the way the wheel looked before we had begun experimenting on it).
The indexing action is fascinating to watch under a microscope and it is clear that this tool can give you extremely well centered and consistent results across all the teeth on the wheel. We did find however that some finesse is seemingly required, not only in precisely selecting the right cutter for your wheel, but also possibly in adjusting the indexing blade spacing, the centering of the cutter and who knows what else. With the first cutter we selected we found that it very thoroughly/nicely shaped one side of the teeth while leaving the other side largely untouched on the flanks of the teeth. We speculated that perhaps the circular pitch of our cutter was wrong for the wheel being cut, but there could have been a number of other reasons I suppose.

lopsided teeth
I think we were all delighted to get a little familiarity with this previously mysterious watchmaking tool and if push-came-to-shove I believe any of the three of us could now even use it adjust a wheel with some success. At some point we may reconvene to try cutting a wheel from a blank that has merely been indexed and slit (either with a slitting saw or possibly even just a file). The impractical aspect of this approach is that the blank has to be attached to an arbor first before it can be rounded up. This would be fine for making a single watch at a time and very precisely cutting your wheel to the size and count required, but not very conducive to making wheels in series I’d think.
Exploratory Watchmaking - Rounding-Up Tool

Thank you, Don ...
Awesome stuff
